반응형
< 원문: http://blog.sdnkorea.com/blog/683 >
기고인: JCO 양사열 부회장
필자는 작년부터 Web 2.0과 함께 부상한 RIA(Rich Internet Application)에 대해 귀가 따갑게 들어왔다. 필자가 현재 몸담고 있는 JCO내에서도 JCO가 직간접적으로 관여하는 각종 세미나 및 행사에서도 RIA는 큰 화두였으며 지금까지도 관심을 끄는 이슈로 부각되고 있다. 이런 이슈에 호응(?)하기 위해 Sun, Adobe, MS에서 JavaFX, Flex, Silverlight 라는 삼총사를 내놓았다. 세가지를 비교하는 것도 재미있는 일이겠지만 본인은 자바 프로그래머로만 10년 가까이 먹고 살았다. Silverlight는 어떤 것 이라는 것만 아는 편이고 Flex는 약간 끄적거려 보았다. 결국 가장 자신있는 Java 진영에서 나온 JavaFX 를 다루어 보기로 했다.
JavaFX를 처음 접한 것은 2007 JavaOne 이 끝난 후였다. 국내 유일의 자바 챔피언인 양수열 고문이(참고로 본인의 친형이다) JavaOne이 끝나고 귀국하고 만난 자리에서 JavaFX가 앞으로 엄청난 발전을 할 것이라고 흥분해서 말했던 기억이 있다. 그 후 몇 가지 관련된 글을 보았었고 2008년 JavaOne에 운이 좋게 참석하게 되어 다시 보게 된 JavaFX는 정말 놀라울 정도로 발전해 있었다. 예전에 간단한 Flash ActionScript 같았던 모습에서 Multimedia 쪽이 대폭 강화되어 수많은 동영상이 화면에 Display되면서 자유롭게 떠도는 Demo를 보고 그 놀라운 Performance에 놀라움을 금치 못했다. 그러면서도 ‘저 Demo가 일반적인 PC에서도 저만큼 가능할까?’ 라는 의문이 들었다. 그래서 결국 만들어 보게 되었으니…
시작하기
JavaFX를 처음 접하면서 느낀점은 JavaFX 문법이 JavaScript와 상당히 닮아 있다는 점이었다. JavaScript와 Java의 절묘한 짬뽕(?)이랄까? JavaFX Application을 물론 메모장으로도 개발할 수 있지만 IDE에 길들여진 개발자들이 메모장으로 개발할리가 없다. 그리고 JavaFX를 전면에 내세운 Sun에서도 개발자들이 편하고 능률적으로 개발할 수 있도록 NetBeans 최신버전에 JavaFX plugin을 추가해 놓았다. 이전에는 JavaFX Pad라는 응용 프로그램을 활용했었으나 좀 더 융통성있고 편하게 개발할 수 있도록 NetBeans에 통합해 놓은 것이다. JavaFX Pad에서와 같이 Source Edit 창에서 코드를 변경하면 위쪽 Preview 영역에서 바로 변경된 결과물을 볼 수 있고 오른쪽 팔레트를 이용해 각종 콤포넌트나 노드 이벤트 등을 원클릭으로 소스에 적용할 수 있다.
NetBeans JavaFX plugin 설치는 신상철 박사님이 운영하시는 JavaPassion을 참고하면 편하게 설정할 수 있다. (http://www.javapassion.com/handsonlabs/javafx_basics1/)

본론으로
JavaFX를 이용해 Multimedia 파일을 컨트롤 하기 위해 필요한 정보와 샘플들을 우선 수집하였다. 일차적으로 Sample Code를 몇 개 받아 mp3 파일을 재생하는 테스트 코드를 만들었을 때 mp3 파일은 아주 잘 재생되었다. 하지만 동영상 파일로 바꾸었을 때는 아래와 같은 에러를 발생시켰다.

Exception의 이름으로 인해 해당 동영상 파일이 FX 에서 지원하지 않는 Media 형식인걸 확인하였고 빠르게 손가락은 구글링을 하여 JavaFX가 지원하는 미디어 포멧을 찾아내었다.
Multimedia 파일을 컨트롤 하기 위해서는 항상 Codec이 문제인데 JavaFX에서는 생각보다 많은 종류의 Codec을 지원해주어 특별히 Codec에 신경 쓰지 않아도 되었다. (물론 가지고 있는 많은 수의 동영상은 실행되지 않았다.)
몇 가지 문제를 잡아나가면서 만들어 낸 결과물은 CustomNode를 사용해 재사용할 수 있는MediaViewNode를 만들었고 Timeline을 이용해 이 Node에 Animation 효과를 보여주는 프로그램을 만들어 보았다. 아래 소스를 실행하면 0.2 배율 스케일의 동영상 화면이 정지된 채로 실행되고 클릭시 회전하며 원래 비율로 커지고 실행되는 프로그램이다.
Main.fx
MediaViewNode.fx
실행 결과

Clip을 클릭하면 해당 동영상 클립이 회전하면서 1:1 스케일로 커지면서 동영상이 실행된다.

아쉬운 것들
-JavaFX Document의 부실함
작업을 위해 다운 받아 펼쳐본 Document는 한마디로 부실함이었다. 물론 아직 초기 버전이라 그런 것이라 생각되지만 현재의 Document는 그냥 어떤 것이 있다는 것을 설명하기 위해 만들어 놓은 수준이라고 봐야 할 것 같다. JDK SE 버전의 Document에 비하면 정말 완성도가 떨어졌다.
-NetBeans JavaFX plugin
미디어 이름에 한글이 들어가거나 공백이 있을 경우 실행시 에러가 발생
실시간으로 코딩시 에러 내용이 표시되는데 간혹 이런 에러 내용이 잘못 표시되는 문제
미디어의 이름을 바꿀 경우 간혹 미디어 적용이 안되 Rebuild 해야하는 불편함
소스에서 사용되는 클래스에 대해 자동으로 import 되지 않는 불편함
이런 문제들은 앞으로 JavaFX 1.0 정식 버전이 나오고 plugin이 업그레이드 되면서 점점 좋아질 것이라고 생각하지만 아직까지는 약간의 불편함을 감수하고 개발해야 한다.
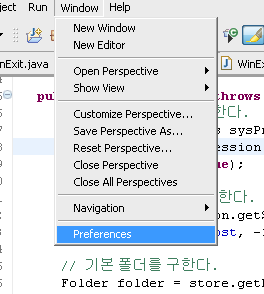
JavaFX로 간단한 동영상 실행 Application을 만들면서 어떻게 이렇게 간단할 수 있지? 하는 생각이 들었다. 이해하기 쉬운 코드 몇 줄로 꽤 대단한 애니메이션 효과를 줄 수 있었고 동영상 플레이도 코드 몇 줄로 끝났다. 자바 Application으로 만들려 했으면 엄청난 소스 코드 속에서 헤메야 간신히 나올만한 프로그램을 JavaFX의 스크립트 몇 줄이 해낸것이다. 물론 이런 힘이 JavaFX 에만 있는 것이 아니다. JavaFX가 경쟁하고 있는 Flex나 Silverlight도 비슷한 수준으로 지원하고 있거나 더 월등히 앞선 기능과 툴을 지원하고 있기도 하다. 지금 현재도 간단한 Application은 만들기 너무 쉽지만 정식 버전이 나올 시점이 되면 지금보다 모든 면에서 더욱 편하고 강력해져야 할 거라고 생각한다. 위쪽에서 지적한대로 Document도 현재 JDK 만큼 완성도가 높아져야 하며 IDE의 발전과 JavaFX가 적용될 수 있는 Platform도 더욱 넓어진다면 다양한 분야에서 JavaFX 가 활약하는 것을 볼 수 있을거라 생각한다.
참조사이트
http://www.javapassion.com/javafx/
http://www.javafx.com
http://java.sun.com/javafx/index.jsp
http://openjfx.dev.java.net
글쓴이에 대해..

양사열
현재 JCO 부회장이며 프리랜서를 하고 있다. 주로 웹 프로젝트와 Database 동기화 솔루션을 개발했으며RIA 쪽에 관심을 갖고 있다. 10년째 개발자로 살면서 앞으로 남은 몇십년도 개발자로 살고 싶은 욕심을 갖고 있다.
기고인: JCO 양사열 부회장
필자는 작년부터 Web 2.0과 함께 부상한 RIA(Rich Internet Application)에 대해 귀가 따갑게 들어왔다. 필자가 현재 몸담고 있는 JCO내에서도 JCO가 직간접적으로 관여하는 각종 세미나 및 행사에서도 RIA는 큰 화두였으며 지금까지도 관심을 끄는 이슈로 부각되고 있다. 이런 이슈에 호응(?)하기 위해 Sun, Adobe, MS에서 JavaFX, Flex, Silverlight 라는 삼총사를 내놓았다. 세가지를 비교하는 것도 재미있는 일이겠지만 본인은 자바 프로그래머로만 10년 가까이 먹고 살았다. Silverlight는 어떤 것 이라는 것만 아는 편이고 Flex는 약간 끄적거려 보았다. 결국 가장 자신있는 Java 진영에서 나온 JavaFX 를 다루어 보기로 했다.
JavaFX를 처음 접한 것은 2007 JavaOne 이 끝난 후였다. 국내 유일의 자바 챔피언인 양수열 고문이(참고로 본인의 친형이다) JavaOne이 끝나고 귀국하고 만난 자리에서 JavaFX가 앞으로 엄청난 발전을 할 것이라고 흥분해서 말했던 기억이 있다. 그 후 몇 가지 관련된 글을 보았었고 2008년 JavaOne에 운이 좋게 참석하게 되어 다시 보게 된 JavaFX는 정말 놀라울 정도로 발전해 있었다. 예전에 간단한 Flash ActionScript 같았던 모습에서 Multimedia 쪽이 대폭 강화되어 수많은 동영상이 화면에 Display되면서 자유롭게 떠도는 Demo를 보고 그 놀라운 Performance에 놀라움을 금치 못했다. 그러면서도 ‘저 Demo가 일반적인 PC에서도 저만큼 가능할까?’ 라는 의문이 들었다. 그래서 결국 만들어 보게 되었으니…
시작하기
JavaFX를 처음 접하면서 느낀점은 JavaFX 문법이 JavaScript와 상당히 닮아 있다는 점이었다. JavaScript와 Java의 절묘한 짬뽕(?)이랄까? JavaFX Application을 물론 메모장으로도 개발할 수 있지만 IDE에 길들여진 개발자들이 메모장으로 개발할리가 없다. 그리고 JavaFX를 전면에 내세운 Sun에서도 개발자들이 편하고 능률적으로 개발할 수 있도록 NetBeans 최신버전에 JavaFX plugin을 추가해 놓았다. 이전에는 JavaFX Pad라는 응용 프로그램을 활용했었으나 좀 더 융통성있고 편하게 개발할 수 있도록 NetBeans에 통합해 놓은 것이다. JavaFX Pad에서와 같이 Source Edit 창에서 코드를 변경하면 위쪽 Preview 영역에서 바로 변경된 결과물을 볼 수 있고 오른쪽 팔레트를 이용해 각종 콤포넌트나 노드 이벤트 등을 원클릭으로 소스에 적용할 수 있다.
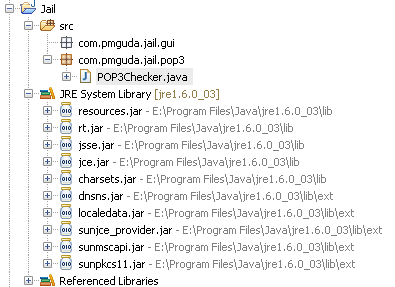
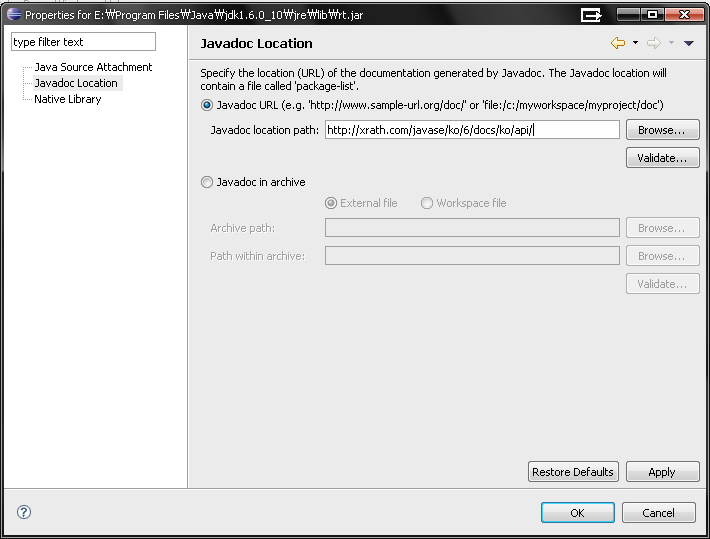
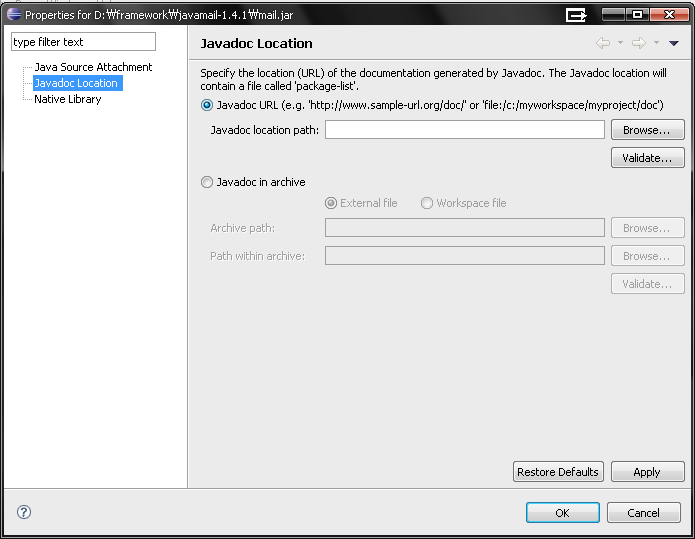
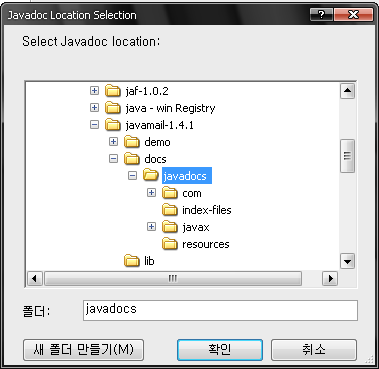
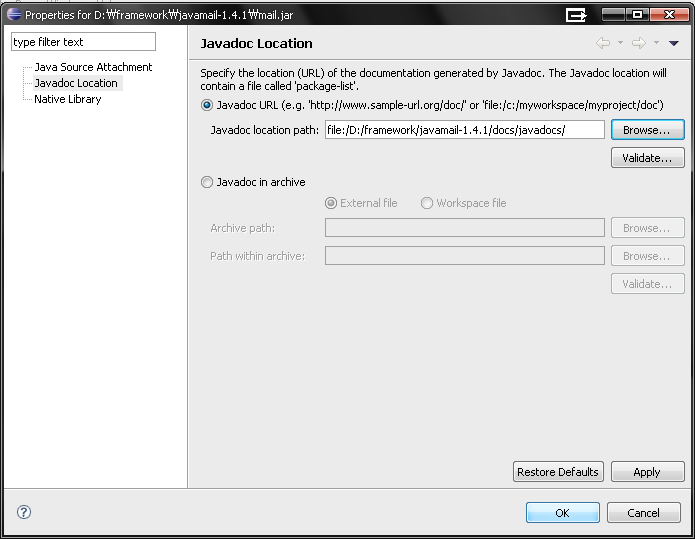
NetBeans JavaFX plugin 설치는 신상철 박사님이 운영하시는 JavaPassion을 참고하면 편하게 설정할 수 있다. (http://www.javapassion.com/handsonlabs/javafx_basics1/)

그림1: JavaFX plugin을 설치하고 실행중인 모습
본론으로
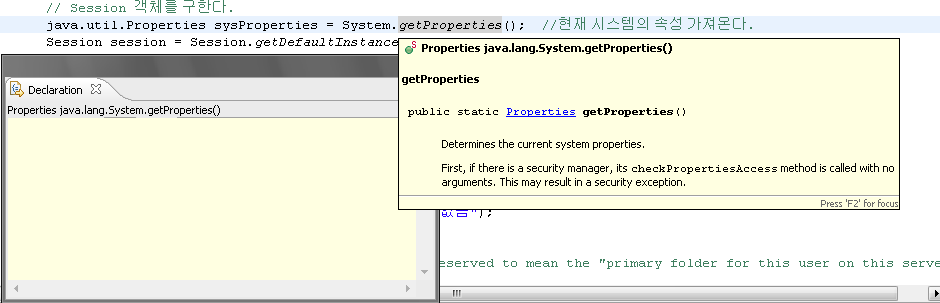
JavaFX를 이용해 Multimedia 파일을 컨트롤 하기 위해 필요한 정보와 샘플들을 우선 수집하였다. 일차적으로 Sample Code를 몇 개 받아 mp3 파일을 재생하는 테스트 코드를 만들었을 때 mp3 파일은 아주 잘 재생되었다. 하지만 동영상 파일로 바꾸었을 때는 아래와 같은 에러를 발생시켰다.
FX Media Object caught Exception com.sun.media.jmc.MediaUnsupportedException: Unsupported media: file:/D:/Projects/NetBeans/SimpleMovie/build/classes/simplemovie/SoHot.avi

    source ='file:/D:/Projects/NetBeans/SimpleMovie/build/classes/simplemovie/SoHot.avi'
그림2 동영상 테스트시 발생한 에러메시지
Exception의 이름으로 인해 해당 동영상 파일이 FX 에서 지원하지 않는 Media 형식인걸 확인하였고 빠르게 손가락은 구글링을 하여 JavaFX가 지원하는 미디어 포멧을 찾아내었다.
JavaFX Media 지원타입
Container Types:
• ASF (Advanced Systems Format),MPEG-1, AVI (Audio-Video Interleaved),WAVE, MIDI (Standard MIDI)
Encoding Types:
• WMAUDIO8 (WindowsMedia Audio 2/7/8),WMSCREEN (Windows Media Screen), WMVIDEO9 (Windows Media Video 9), Voxware, MS MPEG-4, WMVIDEO7 (Windows Media Video 7), MPEG11 Video, MPEG-1 Audio, Uncompressed video (RGB/YUV/RLE), PCM, ADPCM, MP3, MIDI
Protocol Types:
• HTTP, FILE ( Known not to work at present are media with DRM (Digital Rights Management), and media played directly from DVD or CD.)
Multimedia 파일을 컨트롤 하기 위해서는 항상 Codec이 문제인데 JavaFX에서는 생각보다 많은 종류의 Codec을 지원해주어 특별히 Codec에 신경 쓰지 않아도 되었다. (물론 가지고 있는 많은 수의 동영상은 실행되지 않았다.)
몇 가지 문제를 잡아나가면서 만들어 낸 결과물은 CustomNode를 사용해 재사용할 수 있는MediaViewNode를 만들었고 Timeline을 이용해 이 Node에 Animation 효과를 보여주는 프로그램을 만들어 보았다. 아래 소스를 실행하면 0.2 배율 스케일의 동영상 화면이 정지된 채로 실행되고 클릭시 회전하며 원래 비율로 커지고 실행되는 프로그램이다.
Main.fx
/*

 * Main.fx

 *

 * Created on 2008. 11. 8, 오후 1:29:49

 */


package simplemovie;


import javafx.ext.swing.*;

import javafx.scene.*;

import javafx.scene.media.*;

import javafx.scene.effect.*;

import javafx.scene.paint.Color;


/**

 * @author eclips

 */

SwingFrame {

    title: "Movie Player"

    width: 800

    height: 600

    closeAction: function() {

        java.lang.System.exit( 0 );

    }

    visible: true


    menus: [  ]


    content: Canvas {

        width:800

        height:600

        background: Color.WHITE

        content: [

            MediaViewNode {

                // {__DIR__}은 클래스 파일이 있는 디렉토리이다

                mediaURL: "{__DIR__}Nobody.avi"

                viewX: 10

                viewY: 10

            }

        ]

    }

}
MediaViewNode.fx
/*

 * MediaViewNode.fx

 *

 * Created on 2008. 11. 8, 오후 6:48:47

 */


package simplemovie;


/**

 * @author eclips

 */


import java.lang.System;


import javafx.scene.CustomNode;

import javafx.scene.*;

import javafx.input.*;

import javafx.scene.media.*;

import javafx.scene.effect.*;

import javafx.scene.paint.Color;

import javafx.scene.geometry.*;

import javafx.scene.transform.*;

import javafx.animation.Timeline;

import javafx.animation.KeyFrame;

import javafx.animation.Interpolator;


public class MediaViewNode extends CustomNode {

    /**

     * 동영상 화면의 X Sacle

     */

    public attribute viewScaleX:Number = 0.2;


    /**

     * 동영상 화면의 Y Scale

     */

    public attribute viewScaleY:Number = 0.2;


    /**

     * MediaViewNode의 회전 반경

     */

    public attribute rotation:Number = 0.0;


    public attribute viewX:Number = 50;

    public attribute viewY:Number = 40;


    /**

     * 현재 활성화 여부

     */

    private attribute actived:Boolean = false;

    /**

     * 현재 Animation 중인지 여부

     */

    private attribute moving:Boolean = false;


    private attribute media:Media;

    private attribute mediaView:MediaView;


    private attribute strokeColor:Color = Color.DARKGRAY;


    // 동영상 미디어 객체 URL

    public attribute mediaURL:String on replace {

        media = Media {

            source: mediaURL

        };

    }


    // Media Player 객체

    private attribute player =

        MediaPlayer {

            media: media,

            autoPlay: false

        }


    private attribute choiceTimeLine =

    Timeline {

        keyFrames : [

            KeyFrame {

                time: 0ms

                values: [

                    viewScaleX => 0.2,

                    viewScaleY => 0.2,

                    viewX => 10,

                    viewY => 10,

                    rotation => 0.0,

                    moving => true

                ]

            },

            KeyFrame {

                time : 500ms

                values: [

                    viewScaleX => 1.0 tween Interpolator.LINEAR,

                    viewScaleY => 1.0 tween Interpolator.LINEAR,

                    viewX => 40 tween Interpolator.LINEAR,

                    viewY => 40 tween Interpolator.LINEAR,

                    rotation => 360 tween Interpolator.LINEAR,

                    moving => false

                ]

                action: function():Void {

                    player.play();

                    mediaView.toFront();

                    actived = true;

                }

            }

        ]

    };


    private attribute unchoiceTimeLine =

    Timeline {

        keyFrames : [

            KeyFrame {

                time: 0ms

                values: [

                    viewScaleX => 1.0,

                    viewScaleY => 1.0,

                    viewX => 40,

                    viewY => 40,

                    rotation => 360,

                    moving => true

                ]

            },

            KeyFrame {

                time : 500ms

                values: [

                    viewScaleX => 0.2 tween Interpolator.LINEAR,

                    viewScaleY => 0.2 tween Interpolator.LINEAR,

                    viewX => 10 tween Interpolator.LINEAR,

                    viewY => 10 tween Interpolator.LINEAR,

                    rotation => 0.0 tween Interpolator.LINEAR,

                    moving => false

                ]

                action: function():Void {

                    player.pause();

                    mediaView.toBack();

                    actived = false;

                }

            }

        ]

    };


    public function create():Node {

        Group {

            content: [

                this.mediaView = MediaView {

                    mediaPlayer: player

                    scaleX: bind viewScaleX

                    scaleY: bind viewScaleY

                    translateX: bind viewX

                    translateY: bind viewY

                    transform: bind [Transform.rotate(rotation,200,150)]


                    onMouseEntered:

                        function(me:MouseEvent):Void {

                            strokeColor = Color.BLACK

                        }

                    onMouseExited:

                        function(me:MouseEvent):Void {

                            strokeColor = Color.DARKGRAY

                        }

                    onMouseClicked:

                        function(me:MouseEvent):Void {

                            System.out.println("clicked => " + actived);

                            if(moving == false) {

                                if(actived) {

                                    unchoiceTimeLine.start();

                                    System.out.println("inactive - " + viewScaleX);

                                }

                                else {

                                    choiceTimeLine.start();

                                    System.out.println("active - " + viewScaleX);

                                }

                            }

                        }

                },

                Rectangle {

                    width: 708

                    height: 472

                    scaleX: bind viewScaleX

                    scaleY: bind viewScaleY

                    translateX: bind viewX

                    translateY: bind viewY

                    stroke: strokeColor

                    strokeWidth: 10

                    transform: bind [Transform.rotate(rotation,200,150)]


                    onMouseEntered:

                        function(me:MouseEvent):Void {

                            strokeColor = Color.BLACK

                        }

                    onMouseExited:

                        function(me:MouseEvent):Void {

                            strokeColor = Color.DARKGRAY

                        }

                }

            ]

        }

    }

}
실행 결과

그림3. 실행 결과
Clip을 클릭하면 해당 동영상 클립이 회전하면서 1:1 스케일로 커지면서 동영상이 실행된다.

그림4. 실행 결과
아쉬운 것들
-JavaFX Document의 부실함
작업을 위해 다운 받아 펼쳐본 Document는 한마디로 부실함이었다. 물론 아직 초기 버전이라 그런 것이라 생각되지만 현재의 Document는 그냥 어떤 것이 있다는 것을 설명하기 위해 만들어 놓은 수준이라고 봐야 할 것 같다. JDK SE 버전의 Document에 비하면 정말 완성도가 떨어졌다.
-NetBeans JavaFX plugin
미디어 이름에 한글이 들어가거나 공백이 있을 경우 실행시 에러가 발생
실시간으로 코딩시 에러 내용이 표시되는데 간혹 이런 에러 내용이 잘못 표시되는 문제
미디어의 이름을 바꿀 경우 간혹 미디어 적용이 안되 Rebuild 해야하는 불편함
소스에서 사용되는 클래스에 대해 자동으로 import 되지 않는 불편함
이런 문제들은 앞으로 JavaFX 1.0 정식 버전이 나오고 plugin이 업그레이드 되면서 점점 좋아질 것이라고 생각하지만 아직까지는 약간의 불편함을 감수하고 개발해야 한다.
JavaFX로 간단한 동영상 실행 Application을 만들면서 어떻게 이렇게 간단할 수 있지? 하는 생각이 들었다. 이해하기 쉬운 코드 몇 줄로 꽤 대단한 애니메이션 효과를 줄 수 있었고 동영상 플레이도 코드 몇 줄로 끝났다. 자바 Application으로 만들려 했으면 엄청난 소스 코드 속에서 헤메야 간신히 나올만한 프로그램을 JavaFX의 스크립트 몇 줄이 해낸것이다. 물론 이런 힘이 JavaFX 에만 있는 것이 아니다. JavaFX가 경쟁하고 있는 Flex나 Silverlight도 비슷한 수준으로 지원하고 있거나 더 월등히 앞선 기능과 툴을 지원하고 있기도 하다. 지금 현재도 간단한 Application은 만들기 너무 쉽지만 정식 버전이 나올 시점이 되면 지금보다 모든 면에서 더욱 편하고 강력해져야 할 거라고 생각한다. 위쪽에서 지적한대로 Document도 현재 JDK 만큼 완성도가 높아져야 하며 IDE의 발전과 JavaFX가 적용될 수 있는 Platform도 더욱 넓어진다면 다양한 분야에서 JavaFX 가 활약하는 것을 볼 수 있을거라 생각한다.
참조사이트
http://www.javapassion.com/javafx/
http://www.javafx.com
http://java.sun.com/javafx/index.jsp
http://openjfx.dev.java.net
글쓴이에 대해..
양사열
현재 JCO 부회장이며 프리랜서를 하고 있다. 주로 웹 프로젝트와 Database 동기화 솔루션을 개발했으며RIA 쪽에 관심을 갖고 있다. 10년째 개발자로 살면서 앞으로 남은 몇십년도 개발자로 살고 싶은 욕심을 갖고 있다.